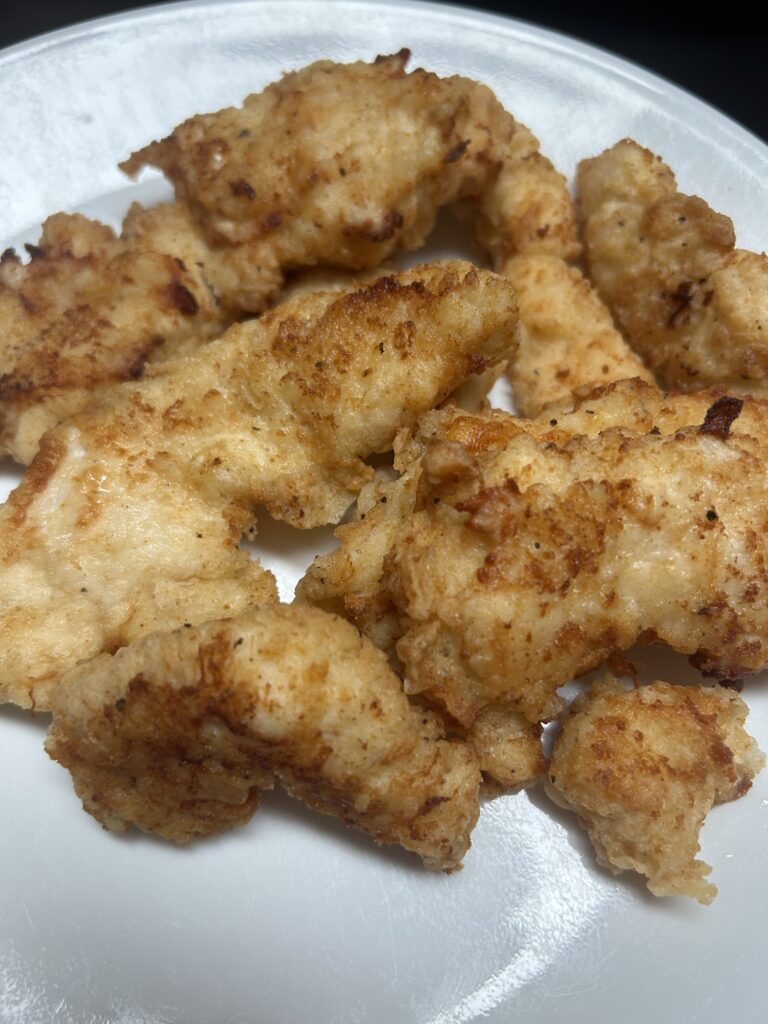
Is there anything better than a plate of crispy, golden fried chicken tenders? There’s something about homemade fried chicken tenders that brings comfort, joy, and a sense of satisfaction to me.
Jump to Recipe
This post may contain affiliate links. Please read our Disclosure Policy.
I have not always enjoyed making fried chicken. In fact, it is usually my most dreaded thing to cook. I have tried numerous cuts and different methods of cooking it, and much to my husband’s disappointment, I just cannot seem to master the all famous chicken leg. It never turns outs perfect. It’s either burnt on the outside or undercooked on the inside.
However, I decided to try my hand at homemade fried chicken tenders. Surely they couldn’t be hard, right? There is no thick pieces with bones to try to cook through and no worrying about it being raw. It should be a quick, easy meal. I searched Pinterest until I found a recipe that sounded good and got to it. I was so excited that I finally made chicken that was good and family approved! It did take a bit of tweaking to get the flour mixture just right, but I finally found the perfect balance of spices to suit our family.
So whether you’re serving them to your family for dinner, hosting a get-together, or simply craving a delicious, crispy snack, these golden, crunchy tenders will be a hit. And the best part? When you make them at home, you’re in full control of the ingredients, not to say we do not enjoy store bought chicken tenders every now and then. Who can pass up making Copycat DQ Chicken Strip Baskets? Definitely not us!
Maybe one day I will have time to do some more experimenting with legs, but for now I will stick with what I know best, chicken breast and boneless, skinless thighs.
Ingredients You’ll Need:
For this recipe, you’ll need basic pantry staples and, of course, some fresh chicken:
- Chicken: 2 pounds of boneless, skinless chicken breasts (or thighs if you prefer dark meat). You can also use chicken tenders if you have them on hand, but cutting your own from whole chicken breasts works great too.
- Flour: 1 ½ cups of all-purpose flour.
- Seasonings:
- 3/4 teaspoon paprika
- 1 teaspoon salt
- 3/4 teaspoon black pepper
- ½ teaspoon cayenne pepper (optional, according to spice preference)
- Buttermilk: 1 ½ cups
- Oil: Canola oil or peanut oil for frying
Equipment:
- One shallow dish for flour mixture
- Large bowl for soaking chicken
- A skillet for frying, these T-Fal have become my favorite!
- A plate covered with paper towels or cooling rack
- Sharp Knife
Preparing the Chicken:
- Prep the Chicken: Start by cutting your chicken breasts into strips or tenders, about 1 inch wide. If you’ve got the tenders already, skip this step! You’ll want uniform pieces to ensure they cook evenly.
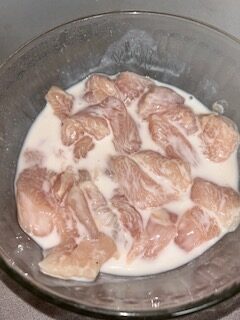
- Marinate in Buttermilk: In a large bowl, pour the buttermilk over the chicken tenders. Add a pinch of salt and pepper for flavor. Cover and let them marinate in the fridge for at least 30 minutes, but if you have the time, let them sit for a few hours. The buttermilk helps tenderize the chicken and infuse it with moisture.

Breading the Chicken:
- Prepare the Flour Dredge: In a shallow dish, combine the flour and your seasoning mix (paprika, salt, pepper, and cayenne). Mix well to ensure an even coating.
- Coat the Chicken: As you are removing the chicken tenders from the buttermilk bath, dip each piece of chicken into the seasoned flour, flipping the chicken as you go to ensure a good, even coating. Repeat this process for all the chicken strips.
Frying the Chicken:
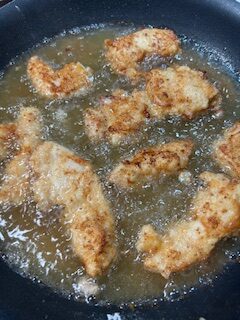
- Heat the Oil: In a large skillet or Dutch oven, pour enough oil to cover the bottom by about 1 inch. Heat the oil over medium-high heat until it reaches 350°F (175°C). You can test the oil’s temperature by dropping a small pinch of flour into the oil, if it sizzles immediately, it’s ready for frying.
- Fry the Chicken: Carefully lower the breaded chicken tenders into the hot oil. Don’t overcrowd the pan, fry in batches if necessary. Fry each batch for about 4-6 minutes, turning occasionally, until the tenders are golden brown and crispy on all sides, and the internal temperature reaches 165°F (74°C).

- Drain and Rest: Remove the fried chicken tenders from the oil and place them on a cooling rack or paper towel lined plate to drain any excess oil. This helps maintain that crispy texture!
Tips for Perfect Fried Chicken Tenders:
- Double Dredge for Extra Crunch: For an even crispier crust, you can double-dip the chicken in the buttermilk and flour mixture. After the first coating, dip it back into the buttermilk and flour for a second round before frying.
- Oil Temperature: It’s crucial to maintain the right oil temperature, too hot, and your chicken will burn; too cool, and it will absorb too much oil and become soggy. A thermometer is your friend here!
- Rest After Frying: Letting the chicken rest for a few minutes on a cooling rack will keep it crispy longer. Plus, it helps retain the juiciness inside.
Serving Your Homemade Fried Chicken Tenders:
These tenders are incredibly versatile, and you can pair them with a variety of sides for a hearty, homestyle meal. Some ideas:
- Serve them with mashed potatoes, green beans, and some homemade gravy and biscuits.
- Dip them in your favorite sauces, ranch dressing, honey mustard, barbecue sauce, or even a homemade hot sauce.
- They are also great leftover the next morning on a homemade biscuit with a little butter.
Easy Fried Chicken Tenders
Equipment
- One shallow dish for flour mixture
- Large bowl for soaking chicken
- A skillet for frying
- A plate covered with paper towels or cooling rack
- Fork or tongs for flipping meat
Ingredients
- 2 pounds boneless, skinless chicken breast You can use tenders if you you have them or thighs if you prefer dark meat.
- Flour: 1 ½ cups of all-purpose flour for dredging.
- Buttermilk: 1 ½ cups
- Oil: Canola oil or peanut oil for frying.
- Seasonings:
- 3/4 teaspoon paprika
- 1 teaspoon salt
- 3/4 teaspoon black pepper
- ½ teaspoon cayenne pepper optional, for a little heat
Instructions
Preparing the Chicken:
- Prep the Chicken: Start by cutting your chicken breasts into strips, about 1 inch wide. If you’ve got tenders already, skip this step! You’ll want uniform pieces to ensure they cook evenly.
- Marinate in Buttermilk: In a large bowl, pour the buttermilk over the chicken tenders. Add a pinch of salt and pepper for flavor. Cover and let them marinate in the fridge for at least 30 minutes, but if you have the time, let them sit for a few hours. The buttermilk helps tenderize the chicken and infuse it with moisture.
Breading the Chicken:
- Prepare the Flour Dredge: In a shallow dish, combine the flour and your seasoning mix (paprika, salt, pepper, and cayenne). Mix well to ensure an even coating.
- Coat the Chicken: As you are removing the chicken tenders from the buttermilk bath, dip each piece of chicken into the seasoned flour, flipping the chicken as you go to ensure a good, even coating. Repeat this process for all the chicken strips.
Frying the Chicken:
- Heat the Oil: In a large skillet or Dutch oven, pour enough oil to cover the bottom by about 1 inch. Heat the oil over medium-high heat until it reaches 350°F (175°C). You can test the oil’s temperature by dropping a small pinch of flour into the oil—if it sizzles immediately, it’s ready for frying.
- Fry the Chicken: Carefully lower the breaded chicken tenders into the hot oil. Don’t overcrowd the pan—fry in batches if necessary. Fry each batch for about 4-6 minutes, turning occasionally, until the tenders are golden brown and crispy on all sides, and the internal temperature reaches 165°F (74°C).
- Drain and Rest: Remove the fried chicken tenders from the oil and place them on a cooling rack or paper towels to drain any excess oil. This helps maintain that crispy texture!
Notes
If you try this recipe, let me know how it turns our for you, and feel free to share your favorite tweaks or dipping sauces in the comments!
Happy cooking!

4 responses to “How to Make Easy Fried Chicken at Home”
honey mustard
Sounds great… My grandmother always soaked her chicken in salt water over night before frying—it was always amazing! Unfortunally, I don’t always know a day ahead when I’m going to cook it.
Love your posts—keep it up
Yes, my grandmother did that as well. I like to do that too, but even though I do meal plan, I forget to get it out of the freezer! Thanks! I hope to write more as I can.
This sounds delicious. I will try it next time – especially the double dipping